Ok… below I will show the final output of our project view.

For this we need to use buttons, labels, richtextbox (you can use textbox also but better is richextbox), and as a special controller call timer. Ok. We go step by step.
First, we create a new project. For that go to FILE->New->Projects. When you go this path, you can see a dialog box. On it you can see tab call Installed in your left-hand site. Inside Installed tab you can see Templates. Inside the Templates you can see all the languages that can use to code using Visual studio. Inside that select Visual C#. In the middle of the dialog box we can see some sort of prebuild C# applications. They have different different usages. We talk about another tutorial. For our project we need the Windows Forms Application. Click on it. And you can change the name, change the location to save (better to set the default location). Then click OK button. You can see a blank C# windows form.
First, we build the timer area. For that we need seven labels. We can see labels on the Toolbox area. Inside the Toolbox there is sub menu call Common Controllers. You can find Labels from there. Double click on Labels and you can get labels on to your form. Get seven labels on to your form and adjusts them in a good manner.

Now we just do some simple modifications to
the labels. For that we can use the Properties tool box in the right-hand side.

You
can see lot of things inside of it and you can change each one of them and you
can get different different outputs. In here we change the Name, Font, and Text
for very basic changes. You must remember the Name is very import an each of
every project because we use the name property to call the controllers (labels,
textbox, buttons. Etc) inside the code. Ok... For a well manner of the code we
use lbl prefix for the label names
for easily catch inside the code. We take seven labels. According to first to
last label we display, label hours, label for show dot, label for show minutes,
label for show dot, label for show seconds, label for show dot, label for show
milliseconds. So, we can name as those labels as lblHours, lblDotOne, lblminutes,
lblDotTwo, lblSecound, lblDotThree, lblmilliseconds like that. (you can use any
name for this and remember to use those names inside the code). Then we change
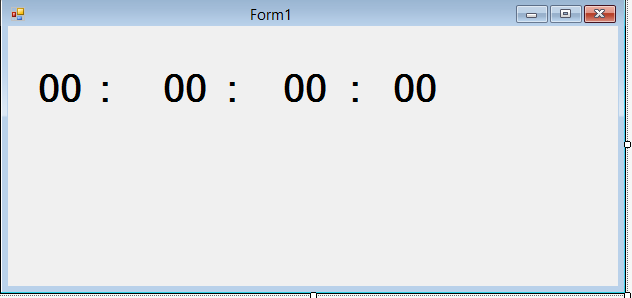
the label text. For that inside the properties box change the Text property. If
you write anything on it will display on the label. For our project write “00” (two zeros) in first label for show
hours. Write “:” to separate dot in
the second label. Do same thing to the other labels get a clock view output.
Then change the font style. For it we change the font Size and Bold options. (Inside
the properties box font menu, you can see a ‘+’ sign. Click on it and you can
expand those commands.). Make all label font size into 28 and bold into True.
Then it gives a nice look to our clock.
Then we move to the button controllers. Add six buttons. It also contains in the toolbox that we get labels. After add buttons we need to change the same properties name, text, mainly and for nice look we change font property. When you change the button name use “btn” prefix for better naming conversion to identify the button names in code clearly. First to last name the buttons as, btnStart, btnRecord, btnReset, btnStop, btnClearRecord, btnExit. Our final view look like this.

Now we need to display the recorded time (Lap time). For it we can use a Rich Textbox control, also in the toolbox common controller area. Also change the name of the Rich textbox as “richtxtRecord”. And add a label to name “Lap Time” and no need to change the name of it because we only use for display a static content and not using for code blocks for calculation or display result, but better to change when you doing a commercial project. It shows you how you professional in the language and coding. Finally select the form (you can click empty area on the form and select the form) and change the name and text and at last you complete the stopwatch view.

Now we are going to do the most important
part, coding. Take a deep breath. Now make relax and calm mind. OK... First, we
need to think the logic of the program (important in every project). In here we
take four units to display in the clock, hours, minutes, seconds, and
milliseconds. According to that we build a logic here as, increasing
milliseconds 0 to 99 and when it comes to 99 again it starts in 0. Simply it is
looping. Also, when the milliseconds came into 99 it increasing seconds into 1.
This logic show as follows.
99 milliseconds = 1 second
60 seconds = 1 minute
60 minutes = 1 hours

Ok…. Now we code step by step. First, we
code for the start button. When we click the start, button need to enable the
timer and disable the start button.
private void btnStart_Click(object sender, EventArgs e)
{
btnStart.Enabled = false;
timer1.Enabled = true;
}
Then the stop button click it should disable
the timer and enable the start button.
private void btnStop_Click(object sender, EventArgs e)
{
btnStart.Enabled = true;
timer1.Enabled
= false;
}
When click the start button timer is needed
to enabled. After timer is enable it need to increase the milliseconds. So, we
need to write a function to do that. For that first declare a global variable
call milliseconds.
private short milliseconds;
Now write the milliseconds increment function.
private void incrisemillisecondss()
{
if (milliseconds == 99)
{
milliseconds
= 0;
}
else
{
milliseconds++;
}
}
In here milliseconds = 99 the global
variable millisecond needs to equal to zero and if not, it should increment one
by one. Also, millisecond equal to 99 there should be one increment in seconds.
So, we need to write a function to increment the second value. The same
scenario it should be increase the minute, hours value also. For that we also
need to declare global variable for seconds, minutes and hours.
private short hours, minutes,
secound, milliseconds;
We can write the functions for each one
like below.
private void incrisemillisecondss()
{
if (milliseconds == 99)
{
milliseconds
= 0;
incriseSecounds();
}
else
{
milliseconds++;
}
}
private void incriseSecounds()
{
if (secound == 59)
{
secound
= 0;
incriseminutess();
}
else {
secound++;
}
}
private void incriseminutess()
{
if (minutes == 59)
{
minutes
= 0;
incriseHours();
}
else
{
minutes++;
}
}
private void incriseHours()
{
hours++;
}
At last we need to write a new function to
display the time. For it we can write a function like this.
private void showTime()
{
lblHours.Text
= hours.ToString("00");
lblminutes.Text
= minutes.ToString("00");
lblSecound.Text
= secound.ToString("00");
lblmilliseconds.Text
= milliseconds.ToString("00");
}
Ok. Now we can code for the timer.
private void timer1_Tick(object sender, EventArgs e)
{
incrisemillisecondss();
showTime();
}
Now you can run the program and click start
and stop button and check whether it is working.
Now we add some advanced features to the
stopwatch. For that we can add a button for reset the time and record the time.
First, we code for reset button. In here we
need to put the clock values into default (zero) and start count timing from
zero. Double click on the reset button add this code try it is work.
private void btnReset_Click(object sender, EventArgs e)
{
hours
= 0;
minutes
= 0;
secound
= 0;
milliseconds
= 0;
showTime();
}
Ok …… now we need to get the lap time, it’s
means record the time. For that we can use the record button and to display the
time we can use the rich textbox.
private void btnRecord_Click(object sender, EventArgs e)
{
string rHours, rMinutes, rSecounds,
rMilliseconds;
string recordTime;
rHours = lblHours.Text;
rMinutes = lblminutes.Text;
rSecounds = lblSecound.Text;
rMilliseconds =
lblmilliseconds.Text;
recordTime
= count.ToString() + ".
" + rHours + ":" + rMinutes + ":" + rSecounds + ":" + rMilliseconds;
count++;
richtxtRecord.AppendText(recordTime);
richtxtRecord.AppendText(Environment.NewLine);
}
Get four string variables to catch the
record value of hours, minutes, seconds and milliseconds separately. Then get a
variable to set the full time as recordTime. Get a count value as a global
variable and assign it as 1. (int count = 1;). Get all the values in the labels when the record button clicks.
(this is the way rHours =
lblHours.Text). Then combine the values to the recordTime. (in the
code that is shown. In there count variable print as count.ToString because the
default value is count in integer and string values are only allowed to print
in the textbox. Then value is print in the rich textbox using AppendText and
Environment.NewLine is used to get a new line.)
Finally, we code for the Clear Record button for clear
the recorded lap time.
private void btnClearRecord_Click(object sender, EventArgs e)
{
richtxtRecord.Text = "";
count = 1;
}
Make the rich textbox empty and make the count
variable set 1.
Then finally the use of Exit button we can close the
application.
private void btnExit_Click(object sender, EventArgs e)
{
Application.Exit();
}
Ok... Now we complete our stopwatch project. You can do modifications
for the project view for better outlook.

Hamm... So, I think this will help you for build a
stopwatch project using C# and thank you for refer my tutorial and we will meet
another helpful tutorial. Don’t forget to comment about your experience. You
can download the complete project from here. https://github.com/Dilank/Stopwatch-in-C.sharp.net
No comments:
Post a Comment